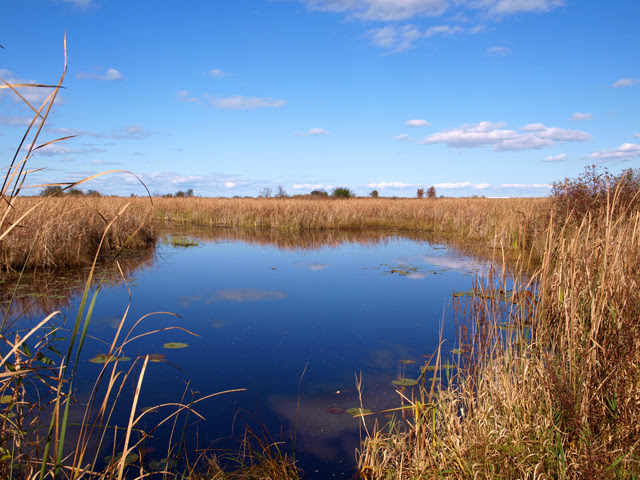
Harvested some milkweeds on the way back from the mailbox yesterday evening. Off to collect some more for paper making!
Showing posts with label papermaking with plants. Show all posts
Showing posts with label papermaking with plants. Show all posts
Tuesday, August 30, 2016
Monday, June 20, 2016
Papermaking with Plants at Langstaff S.S.
As part of my Artist In Education 2015-2016 program with the Ontario Arts Council, students made paper from plants to use in their lanterns. Students made paper from milkweeds, cedar, and daffodil fibers.
 |
| Student stripping cedar fiber for papermaking |
 |
| Papermaking station set-up |
 |
| Sheet forming |
 |
| Milkweed paper is brushed on to a flat surface to dry |
 |
| Daffodil paper |
Friday, October 11, 2013
It's Harvest Time! Papermaking with Plants — Phase 1
It's that time of the year when I start harvesting milkweed fibers for paper making to use in my light sculptures, such as Solo Pacifica, which I made using the Japanese kozo plant. I'll need plenty since in addition to my own art, I will again be teaching my craft to high school students across South Simcoe and the GTA as part of the Ontario Arts Council's Artist in Education program.
Autumn is the ideal time for harvesting milkweed—when their growing season is over and just before their pods begin to open. The milkweeds in my garden didn't grow too well this year. Maybe it's because I started the seedlings too late into the season.
With a grocery bag and a pair of garden clippers; my husband, baby and I headed into the woods in search of milkweeds on a beautiful Wednesday evening.
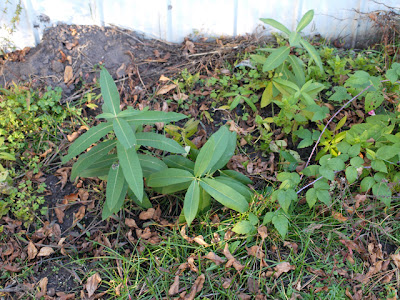 |
| My milkweeds didn't grow too well in my garden. |
 |
| We met a little friend. Maybe he'll want to take a papermaking workshop with me! |
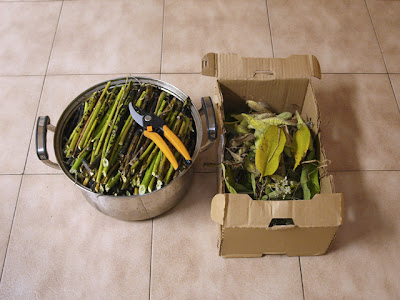 |
| Milkweeds are stripped of leaves and pods. Branches are cut to fit into a steamer. |
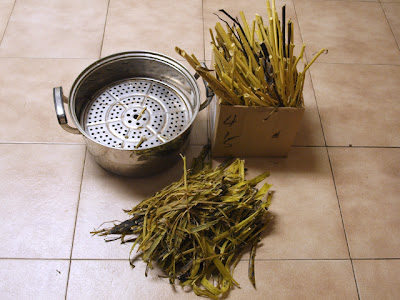 |
| After steaming, the fibers are stripped from their woody cores. |
 |
| Fibers are dried, then stored until I'm ready to use them. |
 |
| The woody cores will make perfect kindling for fall bonfires! |
 |
| The seeds will be sprinkled in my garden for next year. |
Sunday, June 16, 2013
Growing Papermaking Fibers — Hollyhocks and Milkweeds
Early this spring, I started lots of seedlings in preparation for papermaking! I've experimented with a variety of plant fibers in the past; such as onion skins, blackberry bush, maple leaves, and grasses. But what I really love so far was hollyhocks and milkweeds.
The roots of hollyhocks can also be use as formation aid in papermaking too!
It's going to be an awesome summer. I'm predicting A LOT of butterflies!
 |
| A little hollyhock growing. |
The roots of hollyhocks can also be use as formation aid in papermaking too!
 |
| Milkweeds grown from seeds. |
It's going to be an awesome summer. I'm predicting A LOT of butterflies!
Monday, May 23, 2011
Japanese Papermaking

This year, I was very fortunate to receive a grant from the Ontario Arts Council to take a four day papermaking workshop at Kozo Studio taught by Akemi.
Before this workshop, I never knew there was a difference between Japanese style papermaking vs. Western style papermaking. Except for the mold and deckle, I thought the techniques involved are the same.
After Akemi saw my light sculptures, she recommended I take her Japanese style papermaking workshop. Japanese style papermaking are made from harvesting plant fibers (we used kozo fibers), resulting in a thin, strong, and translucent paper — much more suitable for my sculptures.
Here's a brief overview of my four day intensive workshop. All photos are courtesy of Kozo Studio.
 After cooking kozo fibers in a soda ash solution for several hours, the fibers are rinsed and cleaned.
Bark is picked out by hand, the fibers are hand beaten with a wooden stick.
 After hand beating the kozo fibers, we ran it through a machine called the Nagintat beater for a few minutes to "comb" the fibers.
 Cover off showing the blades of the Nagintat beater. Very different from the Hollander beater.
 First try at papermaking with a tiny mold and su.
 Carefully removing the su from the freshly made paper.
 This time with a larger mold and su. The su is actually a bamboo place mat with a sheet of window netting sewn on top of it.
 The su is remove from the mold and brought over to the couching table.
 Slowly removing the su from the freshly made paper.
 After pressing all the water out with a car jack, the sheet of paper easily peels away from the cloth.
 The paper is brushed onto drying board to dry overnight.
In Japan, fibers are harvested from kozo, mitsumata, and gampi trees. Since these trees are not native in Canada, I'm going to experiment and harvest fibers from trees found within by backyard. So far I've made paper with forsythia and hollyhock. Currently my husband just chopped down our garden hedges and a few maple trees...I can't wait to see how these fibers will turn out (or if it's even possible)!
UPDATE: I've since created functional art light sculptures with maple leaves, apple tree leaves and milkweed which are available at my shop.
Wednesday, February 17, 2010
Handmade Forsythia Paper
 This sculpture, Whisp, is decorated with forsythia fibers. The process took two days — and yields only 5 thin sheets of paper! I do like the whispy texture it gives, so I'll give this plant another try ... one day.
Below are the steps I took from harvesting the fibers, to making the paper.
Materials:
- Stainless steel stock pot
- Soda ash
- Stir stick
- Digital Scale
- Papermaking mold and deckle
- Large basin
- Cloths
 Step 1
 I went outside with garden snipers and began clipping off thick branches from my forsythia bush. Don't clip thin branches — they have less fibers. Look for branches that are about 1 inch thick.
I collected as enough branches to fit into my steamer.
 Step 2
Cut at 45 degree angle (to help peeling easier in next step), and place into a steamer.
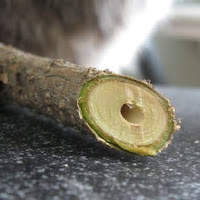 Here's a cross section of a branch — outer bark, fiber (light green), and the woody core. All we want is the fiber, and steaming will make it easier to strip off.
  Step 3
Cover and steam for 30 minutes. Open windows for ventilation.

Step 4
After steaming, peel away the outer bark, and strip the fibers away from the woody core.
 Left to right: bark, fiber, and woody core.
This basket of dry fibers weights about 4 oz, yields about 5 thin sheets.
If you wish to continue with papermaking, continue to step 4. Otherwise, dry the fibers and store in a dry/moisture free place. Dry fibers can be stored indefinitely. When you're ready to make paper, rehydrate the fibers by soaking it overnight
 Step 5
Fill 2/3 of the pot with cold water — you don't want hot water to overflow when you add the stems. Measure out soda ash and add to the pot of water. For every 1 liter of water, use 15 grams (1/2 ounce) of soda ash.
When water is beginning to simmer, add fibers. Let it simmer for 2 hours.
Open windows and doors for ventilation. Every 1/2 hour or so, give it a stir.
 Step 6:
After 2 hours, the water will be dark and thick. Drain and rinse the fibers until the water runs clear.

Step 7:
Begin to pound the fibers until it turns into pulp.
 Step 8:
Set up your couching area by layering a pile of cloths.

Step 9:
Fill basin with water and add pulp. Agitate the water to distribute the pulp evenly.
Slide your mold and deckle into the basin, lift up, and let excess water drain.
 Step 10:
Remove the deckle and bring the mold over to the couching area. Flip the mold over, paper side down, and sponge off excess water.

Step 11:
Gently lift off mold, and allow the paper to dry flat.
Subscribe to:
Comments (Atom)

